Homemade Fruit Roll Ups
This post may contain affiliate links which won’t change your price but will share some commission.
Homemade fruit roll ups are an easy vegan, gluten-free snack. This simple recipe has just 3 ingredients.

Homemade fruit roll ups are one of easiest homemade snacks you can make. When you have an abundance of fruit in the summertime, homemade fruit leathers are the perfect way to preserve it.
These delicious treats are great for when you need to grab something on your way out the door. They taste like candy, but they’re just fruit!

How to Make Homemade Fruit Roll Ups
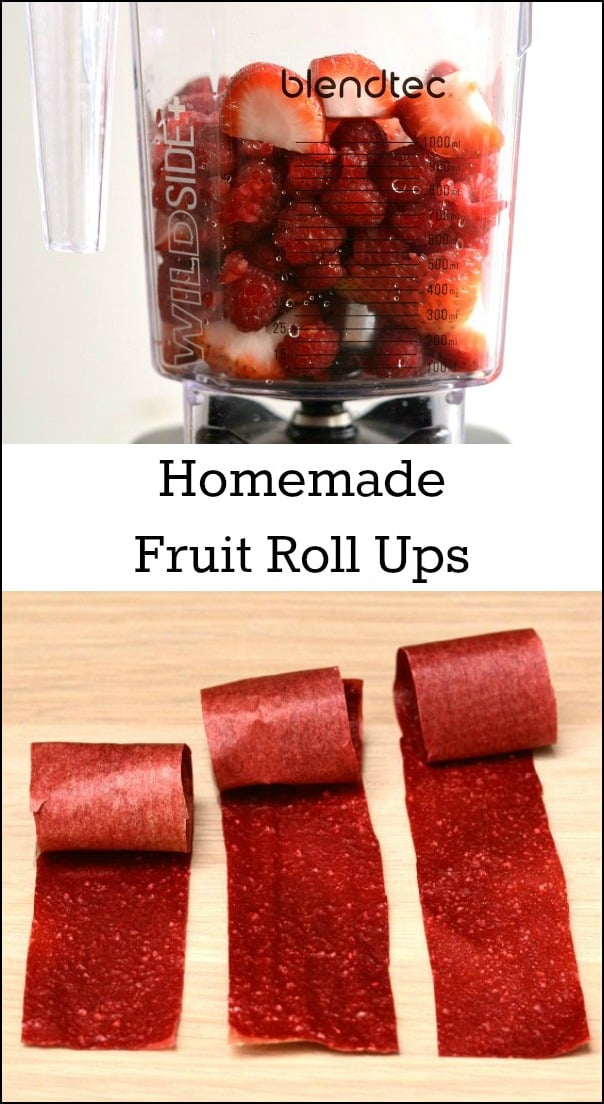
Fruit roll ups can be made with just about any kind of fruit you have on hand. You simple puree it in a high-powered blender or food processor, then dehydrate it.
Depending on the fruit you’re using, you may want to add a little pure maple syrup so the fruit roll ups don’t end up tasting too tart. You’ll need to taste the mixture before dehydrating and use your judgment. Many combinations won’t need any added sweetener at all.
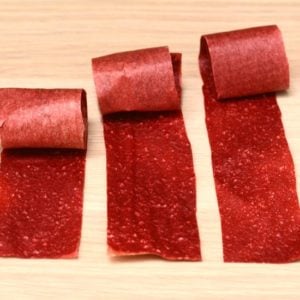
This version is a mixture of raspberries and strawberries, plus a little maple syrup to cut the tartness. It takes about 3 cups of fruit for each baking sheet. Homemade fruit roll ups can be made in an oven or a dehydrator, and I’m including instructions for each method. This is such a fun snack to have on hand.
Check out my dehydrated banana chips and dehydrated strawberries for other easy dried fruit recipes.
Homemade Fruit Roll Ups
Recommended Equipment
- dehydrator optional
Ingredients
- 3 cups chopped strawberries
- 3 cups raspberries
- Pure maple syrup to taste
Instructions
- Puree the fruit in a high-powered blender on medium high. You can strain the seeds if desired, but leaving them in adds a nice texture to the fruit leather.
- You can dry the fruit roll ups in the oven or in a dehydrator. Line 2 baking sheets or 2 dehydrator trays with parchment paper. Alternately, you can use silicone baking mats.
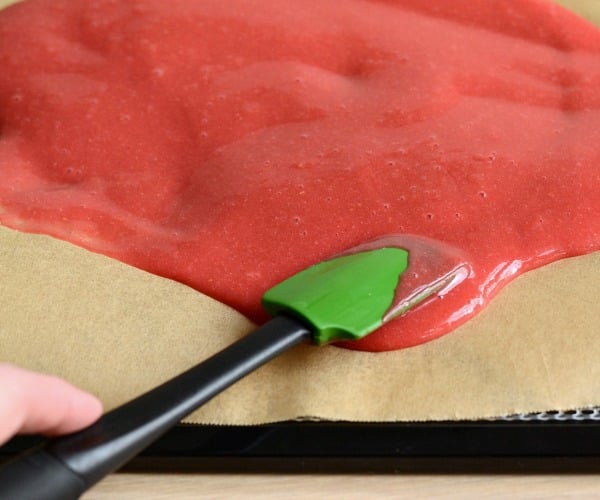
- Pour the puree onto the lined sheets and spread the mixture evenly. It should measure between 1/8 inch and 1/4 inch thick. At 1/8 inch, it will come out almost paper-thin. A thicker size will take longer to dehydrate, but it will have a chewier consistency. Make sure the mixture isn’t less than 1/8 inch thick, or it will come out crumbly.
- If you’re using an oven, preheat it to the lowest possible temperature. In my oven, this is 170 degrees. At this temperature, it takes 3 to 5 hours to dry out the fruit leathers. If your oven has a lower temperature, it will take a little longer.
- If you’re using a dehydrator, set the temperature to 135 degrees and dehydrate for 4 to 6 hours.
- The fruit roll ups are done when they’re leathery but not yet brittle. If you let it bake too long, you can rehydrate it by brushing a little water on it. The outer edges will probably be finished first, so you can cut them off in strips as they’re done.
- Cut the fruit roll ups into strips, leaving each strip on the parchment paper. The paper can be peeled away before eating.
- Store the fruit roll ups in an airtight container for up to 2 weeks.
Approximate Nutrition Info
This recipe may contain affiliate links. A purchase or click through one of these links may result in a commission paid to us at no additional cost to you.


i would make homemade nut butter! Justin’s brand is my favorite and i spend wayyyyyyy too much money on their maple almond butter and chocolate hazelnut butter. i’d love to try to make versions of them both but especially the chocolate hazelnut one 🙂
A smoothie!
WHat a fun contest. I am trying to convert my family to as many “REAL” foods as possible. And they 9 times out of 10 like the “REAL” version better
The first thing I would make, if I won, would be my own nut butter.
I would make my daily smoothie to start the day: a spirulina chocolate energy mix with blueberries and yogurt (with daily slight variations).
I would make a morning smoothie first.
I’m a big smoothie fan so I’d probably christen it with one of those first 🙂