Homemade Ice Cream Sandwiches
This post may contain affiliate links which won’t change your price but will share some commission.
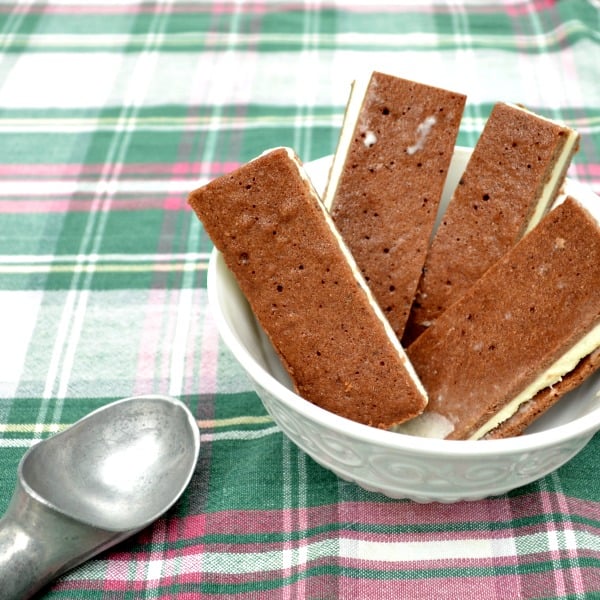
These homemade ice cream sandwiches are the perfect healthy dessert for summer. Try this recipe for a healthy alternative to packaged ice cream sandwiches.

Nothing says “summer” quite like an ice cream sandwich. These iconic treats are readily available in the grocery store, and they’re on sale week after week. The only problem is that the ingredient lists are lengthy and full of chemicals.
If you’re a fan of ice cream sandwiches but you want something healthier, this recipe is the answer.
Homemade ice cream sandwiches are easy to make, they taste far superior to the store-bought version, and they’re less expensive. Everyone loves this delicious homemade treat.
Homemade Ice Cream Sandwich Tips
The chocolate sandwich base is simple to make. Be sure to let it cool completely before assembling the ice cream sandwiches.
I use homemade ice cream for this recipe, but you could soften store-bought ice cream if you’d prefer.
Keep the ice cream sandwiches in the freezer until ready to serve.
Homemade Ice Cream Sandwiches

Recommended Equipment
Ingredients
For the Ice Cream
- 2 egg yolks
- 1/2 cup maple syrup
- 2 cups heavy cream
- 1 cup whole milk
- 2 tsp. vanilla extract
For the Sandwich Base
- 1/2 cup melted butter
- 1/2 cup maple syrup
- 2 eggs
- 1 tsp. vanilla extract
- 1/2 cup white whole wheat flour
- 1/4 cup cocoa powder
Instructions
- Combine the ice cream ingredients in a large bowl. Once they're well-combined, transfer the mixture to your ice cream maker and mix according to the manufacturer’s directions. I use the ice cream attachment that goes with my Kitchen Aid mixer. After churning the ice cream, place it in the freezer to solidify it. (Note: You'll only need about 2/3 of this ice cream for the sandwiches. You can store the rest in the freezer in an air-tight container or snack on it as you're working.)
- To make the chocolate sandwich base, preheat the oven to 350 degrees and grease 2 8×8 inch pans. Place a piece of parchment paper in each pan.
- Combine the wet ingredients in a large bowl.
- In a small bowl, whisk together the dry ingredients.
- Add the dry ingredients to the wet ingredients and mix to combine well.
- Transfer the mixture onto the parchment paper and spread it evenly.
- Bake for 8-10 minutes, until the sandwich base is set and the edges are pulling away from the sides a bit.
- Cool completely on a wire rack.
- To assemble, soften the ice cream slightly so that you can spread it. Don’t let it get runny.
- Place one of the sandwich bases (top side down) on a piece of plastic wrap and spread 2/3 of the ice cream evenly on it. You can save the rest of the ice cream in the freezer for another time.
- Put the other sandwich base on top of the ice cream (top side up) and wrap the whole thing with plastic wrap.
- Freeze for at least 2 hours to let it solidify. Remove from the freezer and cut it in half. Then, cut each section into 6 sandwiches for a total of 12 sandwiches. Enjoy immediately or wrap the sandwiches individually and return them to the freezer.
Notes
Approximate Nutrition Info
This recipe may contain affiliate links. A purchase or click through one of these links may result in a commission paid to us at no additional cost to you.
Homemade Ice Cream Sandwiches Price Breakdown
Besides the delicious taste, the best thing about these gourmet-quality ice cream sandwiches is the price. The cost of the ice cream is $3.02 and the cost of the sandwich base is $2.74, for a total of $5.76. The recipe makes 12 ice cream sandwiches, for a total cost of $.48 per sandwich.
I couldn’t find any real food ice cream sandwiches to compare this to, but Julie’s Organic ice cream sandwiches, which are healthier than most, retail for $.83 per sandwich. And Julie’s sandwiches contain palm oil, caramel color, and soy lecithin. Do yourself a favor and try this recipe – you won’t be disappointed!
Here’s my recipe for gluten-free, dairy-free ice cream sandwiches for an allergy-friendly alternative.


Do you happen to have any idea how finely ground almond meal would work for replacing flour in the cookie part of this recipe?
Super excited to try this recipe either way. These look delicious!
Thank you, Heather! I haven’t made these with almond meal, but I don’t see why it wouldn’t work. Let me know if you try it that way.
I’ve been looking for a healthy ice cream sandwich recipe, do you think it’s easy enough to replace the wheat flour with another gluten-free one like coconut flour?
I have a great recipe for gluten-free ice cream sandwiches: https://realfoodrealdeals.com/2012/06/16/ice-cream-sandwiches-gluten-free-dairy-free/. I actually prefer the GF version.
My kids are going to LOVE you for this recipe!! These ice cream bars look amazing! Thank you for sharing at Fit and Fabulous Fridays!
This would be good to turn into an ice cream cake!
Great point about the ice cream cake! I almost tried that a few days ago for my daughter’s birthday, but she changed her mind and requested a store-bought coffee cake instead! I guess we have too much homemade food around here.
What a great recipe…and NO sugar?! I love that. I’m pinning it too!
Thanks, Marsha! It’s great to find ways to make desserts without processed sugar.
Do you have to use an ice cream maker or could you make it some other way by hand? Sounds wonderful
Delicious … I want to get some of these loaded up in my freezer as fast as possible!!! I am saving your link!!!
Great! I hope you love them as much as we do.
I couldn’t agree more…summer is ALL about ice cream sandwiches!
I love the sandwich base!!
So do I! They’re like mini-brownies and they taste so good with the ice cream.
Yummy! Problem is, I want one right now!
I know, they’re hard to resist!
Wow, these look perfect for summer. Pinning now!
Great! I hope you give them a try. Your sweet tooth will thank you, and there’s no white sugar in them! You could even cut the syrup way back in the ice cream for more of a “whipped cream” taste.
Do you ever cook something that is not delicious and appetizing? 🙂
Aww, you’re too sweet! Of course I do – they just don’t make it onto the blog!